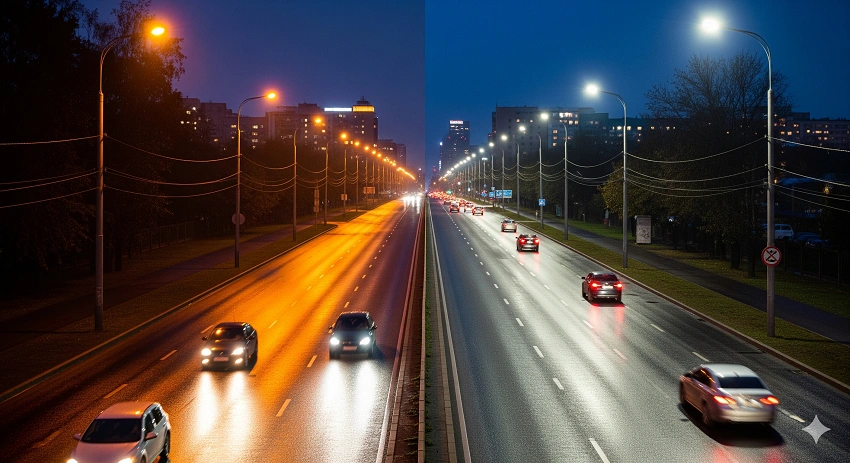
LED flood lights can replace metal-halide fixtures either by replacing the complete luminaire or by using a compatible, approved LED retrofit kit. Contractors should first survey the existing installation, select LED wattage and beam distribution from the required lighting performance, check electrical and mounting compatibility, and verify results after commissioning.
On sports fields, industrial yards, and high-mast installations, lower electricity use alone does not mean the retrofit is successful. Poor beam selection or unsuitable mounting can leave dark spots, increase glare, and force costly return visits with lifting equipment. Designing around the site’s actual lighting needs is more reliable than applying a fixed lamp-wattage conversion ratio.
How Can LED Flood Lights Replace Metal-Halide Fixtures?
LED flood lights can replace metal-halide fixtures in two ways: contractors can install complete LED luminaires or convert suitable existing fixtures using compatible, approved LED retrofit kits. Complete replacement is generally preferable when the old housing has deteriorated or a new lighting layout is needed. A retrofit kit is appropriate only when its mechanical, electrical, thermal, and applicable approval requirements are met.
The decision affects how much existing equipment remains in service, including enclosures, electrical components, and mounting hardware. Check the condition of those parts and the site’s lighting targets before comparing the two methods on installation cost alone.
With a complete replacement, the contractor removes the old luminaire and its unneeded associated equipment, then installs a purpose-built LED flood light with a matched driver and optical assembly. This is often attractive where reflectors or housings have aged, the light distribution needs improvement, or future access is costly.
A retrofit kit instead converts an existing luminaire using parts specified by the kit supplier. Retaining a housing can reduce some removal work, but it does not eliminate concerns about heat, sealing, wiring, or long-term condition. In the United States, UL Solutions explains that certified kits must be used with identified or permitted host luminaires and installed as instructed.
Comparing the two metal-halide replacement methods
| Decision factor | Complete LED luminaire | LED retrofit kit |
|---|---|---|
| Old fixture condition | Suitable when a housing needs replacement | Requires an acceptable existing housing |
| Optical flexibility | New optics and distribution can be selected | Limited by the host fixture and approved kit |
| Electrical and thermal design | Uses a matched LED luminaire system | Must comply with kit-specific requirements |
| Installation and maintenance | More equipment is replaced; future access may improve | Some parts remain; their condition still matters |
| Approvals and documentation | Verify the new luminaire’s required approvals | Verify kit and host compatibility and instructions |
Neither approach is automatically cheaper when labor, access equipment, maintenance, and approvals are considered. Contractors planning complete replacement can evaluate OAK LED flood lights as candidate luminaires, then confirm the chosen configuration through project-specific lighting design.
Start With an Honest Picture of the Existing Site
A useful site survey records existing luminaire models, quantities, lamp and system wattages, supply details, mounting geometry, measured light levels, operating hours, and environmental conditions. These establish both the electrical baseline and the lighting target for the proposed upgrade.
Site Records That Make a Replacement Design Reliable
The site checklist should cover five groups of information: existing equipment, electrical system, mounting arrangement, lighting targets, and operating conditions. Collect these from records, equipment labels, site drawings, and measurements rather than relying on lamp wattage alone.
- Existing luminaires: model, rated lamp wattage, quantity, condition, age if known, and observed failures.
- Electrical system: supply voltage, measured total input power including ballast losses, ballast type, circuit protection, wiring, and controls.
- Mounting arrangement: pole and bracket condition, luminaire position, height, spacing, aiming direction, dimensions, and access restrictions.
- Lighting requirements: site plan, target areas, existing average and minimum illuminance, required illuminance, uniformity, and project criteria.
- Operating conditions: annual operating hours, ambient temperature, dust, moisture, corrosion exposure, vibration, and maintenance access.
Record measured system input power separately from the lamp’s nominal wattage. Also separate current light levels from the project’s required light levels: old lamps, dirty lenses, or deteriorating reflectors may have reduced illumination over time. Designing only to match that weakened baseline can perpetuate an underlit site.
Spot Structural, Electrical, and Environmental Constraints Early
Inspect mounting structures, wiring, grounding, protective devices, controls, and any parts exposed to unusual heat, moisture, corrosion, or vibration. These conditions can affect whether a proposed LED luminaire can be installed and operated safely.
For high-mast sites, confirm the mounting bracket, pole capacity, and wind-loading assumptions for the new fixture’s weight and projected area. Sports facilities need secure mounting and access for final aiming. Coastal projects may call for corrosion-resistant configurations; hot industrial areas require verified fixture and driver temperature limits. Airport projects can impose additional site rules, while hazardous locations require equipment approved for the relevant area classification, not ordinary floodlights by default.
Once these constraints are documented, OAK LED can use the site information to propose a lighting layout and customized product configuration. Engineering review should still establish the exact model’s suitability for each location.
Design for Light on the Ground, Not Watts on the Label
Choose LED power and beam distribution from the light levels required on the target surface, the mounting height, throw distance, site geometry, and photometric performance. Do not select a replacement using a fixed metal-halide-to-LED wattage ratio: validate candidate fixtures in a lighting model first.
Why Fixed Wattage Conversion Ratios Mislead
A fixed wattage conversion is unreliable because watts measure electrical input, not useful light delivered to the site. Ballast losses, lamp aging, reflector condition, optical distribution, and installation geometry all affect the comparison.
For a 250W or 400W metal-halide installation, check the existing coverage and required target levels before considering a replacement. For 1000W systems, throw distance, pole height, and glare can dominate the design. For 1500W-2000W sports or high-mast systems, project-specific modeling is especially important. These are assessment scenarios, not universal LED-equivalent wattages.
A successful replacement is defined by verified light on the target area, not by a simple reduction in watts.
Use Photometric Modeling to Protect Coverage and Control Glare
Beam angle and photometric design confirm an LED replacement by showing whether the proposed fixtures deliver the required illumination across the actual site. Engineers should use the candidate luminaire’s IES or LDT file in a layout model, with the intended mounting positions and aiming angles.
Narrower distributions often help longer throws, while wider distributions may cover nearer, broader areas. Yet beam angle alone does not describe the full intensity pattern. On a sports field, a poorly aimed high-output fixture can create a bright patch near one pole while leaving the far side dark.
Review average and minimum illuminance, the specified uniformity ratio, glare from relevant viewing directions, and spill light beyond boundaries. If the layout fails, adjust beam distribution, fixture count, positioning, or aiming before assuming more wattage is the answer. The calculation should also establish whether existing pole locations can remain.
For long-throw projects, evaluate applicable OAK LED high-mast configurations; our flood-light optics selection guide explores beam control in more depth. Proposed simulation results are design estimates until field measurements verify the installed system.
Turn the Approved Design Into a Safe Installation
With the lighting design approved, carry out the retrofit in five stages: site survey, design sign-off, installation safety approval, installation and commissioning, and final verification. Each stage should produce a clear approval or record before the next begins.
- Survey the existing system and record its electrical, physical, and lighting baseline.
- Approve the LED fixture schedule, photometric layout, and agreed acceptance targets.
- Confirm structural and electrical compatibility, safety arrangements, and applicable approvals.
- Have qualified personnel isolate circuits, remove or modify old equipment as specified, install the LEDs, aim the fixtures, and commission controls.
- Measure completed lighting and system input power, correct deviations, and hand over as-built and test records.
Plan shutdowns, lifting equipment, site access, and disposal of mercury-containing metal-halide lamps through the appropriate local waste route. Final acceptance should refer to the approved design and project requirements, not a visual impression that the new lights appear brighter.
Prove the Retrofit Works Before Counting the Savings
First verify that the completed LED installation meets the required illuminance, uniformity, and glare criteria. Only then should energy savings and ownership costs be judged against the original system using comparable measurements and actual input power. A smaller electricity bill is not a successful retrofit if the site is left underlit.
Verify Lighting Levels Where They Matter
Verify performance by measuring average and minimum illuminance, calculating the specified uniformity ratio, checking glare and spill light, and recording total LED input power. Use comparable measurement points and conditions before and after installation wherever practical.
Minimum illuminance helps identify dark areas that an average value can conceal. For sports venues, drivers’ areas, and nearby properties, assess glare or spill light using the relevant project method and observation locations. The acceptance decision should follow the agreed criteria rather than a claim of increased brightness alone.
Calculate Savings From Actual System Input Power
Calculate energy savings using the difference between complete system input powers multiplied by annual operating hours. Include metal-halide ballast consumption in the original baseline.
Annual energy savings (kWh) = (Existing MH system W – LED system W) / 1,000 x annual operating hours.
In a hypothetical one-fixture example, a metal-halide system draws 1,080W including its ballast, while an LED system draws 400W. At 4,000 operating hours annually and US$0.15/kWh, annual energy savings are (1,080 – 400) / 1,000 x 4,000 = 2,720 kWh, equivalent to US$408 in electricity costs. Input-energy use falls by approximately 63% under those assumptions.
This is an arithmetic illustration, not a verified OAK LED case study or proof that 400W LED universally replaces a 1000W metal-halide fixture. Actual results need measured loads, operating schedules, and acceptable photometric performance.
Compare Five-Year Ownership Cost, Not Fixture Price Alone
Compare total retrofit costs by combining purchase and installation costs with energy, maintenance, and operational costs over a common period. A five-year total cost of ownership model should include fixtures, electrical or structural modifications, labor, access equipment, expected maintenance, electricity, and any disruption costs.
For elevated fixtures, hiring lifting equipment and arranging shutdowns can materially affect value. Use site-specific costs and electricity tariffs; do not promise a universal payback period when project inputs are unknown.
OAK LED supports overseas projects with lighting design, manufacturing, and OEM/ODM customization. Share your metal-halide fixture schedule, site drawings, mounting heights, electrical details, and lighting targets to request a free LED floodlight replacement assessment.
FAQ
Can You Reuse the Existing Metal-Halide Ballast With LED Lighting?
Only if the chosen LED retrofit product explicitly supports the existing ballast and its approved instructions permit that connection. Complete LED luminaires typically use matched drivers; never assume the former ballast can stay in circuit.
Can LED Floodlights Be Installed on an Existing 480V Supply?
Yes, but only when the specific LED luminaire and driver are rated for 480V and the installation satisfies local electrical requirements. Some standard LED floodlights have lower input-voltage ratings, so verify the exact model rather than assuming product-family compatibility.
What Documents Should Be Requested Before Purchasing LED Replacement Fixtures?
Request model-specific datasheets, IES or LDT photometric files, relevant approvals, installation instructions, operating-temperature limits, warranty terms, and the proposed lighting calculation. Check that certificates and reports cover the actual model and configuration being purchased.
Turn Site Data Into an LED Replacement Plan
If you already have an equipment schedule and site drawings, use them to commission a replacement design rather than requesting a watt-for-watt quotation. Confirm the lighting plan, installation compatibility, and acceptance criteria before comparing expected electricity and maintenance savings.